Showing posts with label Recipes. Show all posts

Tuesday, June 26, 2012

Lemon Basil Tomato Pesto Pasta with Shrimp

Lemon Basil in the garden....

Southern Ontario is experiencing a wonderfully warm and steamy summer so far, which means that it's only June 23 and my garden looks like the 'after' picture from a Miracle Grow commercial.  This weekend I was delightfully surprised to find that my lemon basil plant already had enough leaves to make pesto....(YAY!). 

A couple of years ago, on one of my yearly trips to Florida, my aunt made this memorable Tomato Pesto Pasta with Shrimp.  You know how some dishes (for whatever reason) just stick with you (this happens to me all the time)....this pasta dish was no exception.  So I thought I'd take a crack at replicating it....and it turned out to be a TOTAL SUCCESS.

This recipe will give you left over pesto, which can stay in the fridge for a few weeks.  It has a fresh taste (from the lemon basil) and light richness (from the roasted garlic and roasted tomatoes) that would be great with baked fish, baked chicken, as a spread on a baguette (mmmm, baguette)....etc.
Mmmmmm...pasta....
Lemon Basil Tomato Pesto Pasta with Shrimp

Ingredients:

20 cloves of garlic, peeled
1/2 cup of olive oil, plus a little more for roasting tomatoes
1 pound cherry tomatoes, washed and drained
1/4 cups + 2 tablespoons pine nuts
1/4 grated Parmesan
Salt and pepper
1 cup packed lemon basil leaves, rinsed and drained (regular basil will work just as well)
1 package of brown rice spaghetti (standard package is 454g)  (any pasta will work here - just modify the cooking time according to the package instructions)
1 pound large shrimp, shelled and deveined

Directions:

Pesto:
(1) Preheat oven to 375 degrees
(2) Place garlic in a single layer in a small baking dish
(3) Add 1/2 cup of olive oil to the dish, making sure all of the garlic cloves are coated
(4) Cover the baking dish with foil.  Roast garlic cloves in the oven for 45 minutes until fragrant and golden brown
(5) In a medium sized baking dish, toss the cherry tomatoes with enough olive oil to lightly coat (about 2 tablespoons)
(6) Place the tomatoes in the oven (at the same temperature --- 375 degrees) and roast (uncovered) for 25 minutes
-Tomato skin should be blister-y when they are ready
Roasted Tomatoes...
(7) While the garlic and tomatoes are roasting in the oven (your kitchen should smell really yummy by now), in a small fry pan on the stove, over medium heat, toast all of the pine nuts for about 15-20 minutes or until they are golden brown, turning occasionally so they don't burn…
-pine nuts should to be toasted before using.  There is this thing called 'pine nut mouth' that is not dangerous, but will mess with your tastebuds for a couple of days – which is not fun...

Toasting pine nuts...
(8) When the garlic is nicely roasted, remove the baking dish from the oven and remove the garlic cloves from the oil (both the garlic and the oil will be HOT so be careful).  Set the garlic aside in a small bowl.  Reserve the oil for use later.

          
Roasted garlic cloves on the bottom, garlic infused olive oil on the top...
       
(9) In a food processor, blend the roasted garlic and 1/4 cup of the toasted pine nuts until creamy
(10) Add the roasted tomatoes to the food processor (not including the olive oil from the dish the tomatoes were roasted in – this will make your pesto too liquidy) and lemon basil leaves.  Blend until smooth.
(11) Add the Parmesan.  Blend until smooth.
-while the food processor is running, add 1-2 tablespoons of the garlic infused olive oil.  This helps to bring everything together and enhances the garlic flavour.
(12) Your pesto should be the consistency of a paste now.  Season for salt.

Lemon Basil Tomato Pesto....
 Note: you will have leftover pesto. 

Pasta:
 (13) In a large pot of boiling salted water, cook pasta, stirring occasionally, until almost tender, about 8-10 minutes
-I find that brown rice pasta is super starchy.  When water is super starchy, pasta will stick together - so make sure you are using a big enough pot with plenty of salted water to assist with constantly moving the starch away from the pasta surface.
-Salt your water people.  Adding salt now will reduce the amount of salt/cheese/butter you will have to add later.
(14) Reserve about a 1/2 cup of the pasta water prior to draining the cooked pasta
-this will be used to aid in the when tossing the pasta with the rest of ingredients later....

Shrimp: (can be done while pasta is cooking)
(15) In a small fry pan over medium-high heat, add 2 tablespoons of the garlic infused oil
(16) Season the shrimp with pepper and sauté until the shrimp turn pink (about 5-6 minutes....don't overcook - rubbery shrimp is never good...)
(17) Remove from heat


(18) In a large bowl, add the cooked pasta, and some of the pesto (I usually put 3-4 heaping spoonfuls - about a 1/4 of the total amount of pesto that this recipe makes).  Toss to coat the pasta with pesto.  If needed, add a bit of the pasta water to make tossing easier. 
(19) Add the shrimp and lightly toss just to coat the shrimp.
(20) Season for salt and pepper
(21) Garnish with the 2 tablespoons of leftover toasted pine nuts. 
Optional - serve with chilli flakes and lemon wedges on the side


Nutritional Information (for one serving - 1/5 of the final product):
Calories 583
Fat 19g
Carbs 76g
Fibre 5g
Protein 27g
WW Points 15

Happy Cooking!

Wednesday, March 28, 2012

Teriyaki Marinated Salmon Fillet in Phyllo Pastry

So I saw the movie 'Salmon Fishing in the Yemen' a couple of weeks ago - which was the inspiration behind me sitting down to write this post for my favourite salmon recipe.  This movie is probably one of the best romantic comedies that I've seen in a while.  It’s hilarious (which is almost entirely because of Kristen Scott Thomas) and heart-warming.  And come on....the title alone would make me want to see it....

I picked up this recipe from my Sauces and Marinades class.  There is something about wrapping the salmon teriyaki in layers of butter and phyllo pastry that makes it a-mazing (I am sure wrapping anything in layers of butter and phyllo pastry would have the same effect....I might even consider giving tofu another chance if it was wrapped in layers of butter and phyllo pastry....).  I think the phyllo pastry has the added benefit of 'fancy-ing up' (yes, 'fancy-ing' is a word) the basic salmon teriyaki recipe.  Whatever the reason, the combination is delicious.

This is an adapted version of the recipe that was taught in class.  I turned the marinade into a glaze.  I find the glaze holds better to the salmon once it's wrapped in phyllo.  Should you want to be healthy, you can skip wrapping the teriyaki glazed salmon in layers of butter and phyllo pastry and instead pan fry or grill it.   

Also, since salmon has a lot of natural flavour, make sure you use a low sodium soya sauce - otherwise you will end up with a big salty mess.

Teriyaki Marinated Salmon Fillet in Phyllo Pastry
(makes 4-6 servings)

Ingredients:


6 tbsp sherry
1 cup low sodium soya sauce
3 tbsp brown sugar
2 tsp sliced ginger
4 tsp crushed garlic
1 1/2 pounds salmon fillet
1 cup unsalted butter
1 tsp crushed garlic
1 box phyllo pastry
Sesame seeds
1 package panko bread crumbs (can be found at most grocery stores in the 'Asian foods' section)
1 cup sour cream
Lemon zest (to taste)
Chives

Directions

Glaze:
(1) Combine sherry, soya sauce, brown sugar, ginger and 2 tsp sliced garlic in a small pot
(2) On medium heat, simmer slightly for about 20 minutes, stirring occasionally
-be careful not to turn the heat up too high, the sugars in the sherry and the brown sugar will burn and give your sauce a bitter taste
(3) Once mixture has thickened (to the consistency of a syrup) remove from heat and let cool completely

Sherry, soya sauce, brown sugar, ginger and garlic....
Salmon:
(1) Remove the skin from your salmon fillet; Trim off any bits or grey fat
(2) Cut the salmon fillet into serving sizes
-you might want to consider making the serving sizes a little smaller if you intend on wrapping it in Phyllo
(3) Rinse salmon pieces and pat dry

Assembly:
(1) Brush both sides of each salmon piece with glaze.  Let this air dry and then repeat.
-do this on a rack so the excess marinade can drip off
-it doesn't have to be completely dry.  I would give it 10-15 minutes between brushing
***Optional (if not wrapping in phyllo) - At this point you can either grill or pan fry or broil your salmon - basting with any remaining glaze if you so desire***
(2) When salmon has been brushed with a second coat of the glaze and is drying, in a small saucepan, melt butter over medium-low heat.  Add 1 tsp of crushed garlic to butter and let cook for about 30 seconds .  Remove from heat, but don't allow this to cool (to avoid the butter congealing).
(3) Put the panko bread crumbs in a bowl; set aside.

Wrapping Salmon in Phyllo...
As soon as Phyllo senses air, it dries out QUICKLY.  Once it dries out, it will get hard and flaky and eventually you will not be able to work with it.  To avoid this I usually grab a section of damp paper towel (about the size of 1 sheet of phyllo) and cover any unused phyllo while I am working.  This doesn't stop the drying out completely, but it definitely helps.  Also try to avoid working with phyllo near any type of heat source....
Remember to keep phyllo pastry covered with a damp paper towel!
(4) Working quickly, lay out one layer of phyllo on a clean dry counter top; Using a pastry brush, cover the layer with the still warm (so it's still liquid-y) garlic butter.
Alternately, you can cut 1 layer of phyllo into two and use the halves to create layers...
(5) Grab a second layer of phyllo, place on top of first layer
-butter adds flavour but also acts as a glue to keep the layers of phyllo together
(6) Cover the second layer of phyllo with garlic butter
(7) Grab a third layer of phyllo and place on top of the second (remembering to keep unused phyllo covered with damp paper towel), cover the third layer with garlic butter
(8) Put a mound of panko bread crumbs in the middle of your pastry
(9) Place a piece of salmon on top of the panko crumbs
-The bread crumbs are there to absorb any excess moisture
Salmon on top of panko, ready to be wrapped in phyllo!
(10) Enclose salmon in phyllo
-this can be done any number of ways.  I usually wrap the salmon with the phyllo dough like an envelope.  This has the added bonus of creating more layers of phyllo-buttery goodness.
-be sure to use the garlic butter as a 'glue' to ensure that all folded ends of the pastry and 'glued together'
(11) Place folded side down on baking sheet.  Brush top with butter and sprinkle with sesame seeds. 
Ready to be baked!
(12) In a 450 degree oven, bake for 15-20 minutes
-Check periodically to ensure that the pastry is not burning
(13) Remove from oven and serve with sauce (below)
So good!
Sauce:
Combine sour cream with lemon zest (to taste).  I usually put about 1/2 tsp of lemon zest.  Garnish with chives.

Salmon can be served with a quick green bean almondine....
Happy Cooking!

Monday, March 5, 2012

Rock Buns


My Grandmother.....
When I was younger, my grandmother often came over and spent the weekend.  This was always so exciting, because I was lucky enough to have one of those grandmothers who spoiled me with attention, cuddles & kisses.  AND when we baked together she would let me put sprinkles on everything - & when your 6, the person who lets you put sprinkles on things is the next best thing to Santa Claus. 

One of the earliest memories I have in the kitchen is baking Rock Buns with my grandmother.  Rock buns are an excellent breakfast/snack foods.  Think muffins without the bottom (I only eat the tops of muffins...unless it is an amazing muffin - like a chocolate chip muffin - only then I might consider eating the bottom).  Rock buns are super easy to make.  They take maybe 15 minutes to mix, and 25-30 minutes to bake.  And you can put pretty much anything in the rock buns to make different variations - shredded coconut, cranberries, chocolate chips...the options are endless!

It was my grandmothers 87th birthday last weekend.  Like many 87 year old, her short-term memory is not too good, and she sometimes has a vacant look in her eyes.  It's the unfortunate signs of Alzheimer’s setting in. 

Her story is not unlike many woman with a South Asian background from her generation - Arranged marriage at 13, had her first child (of nine) at 15, complete with relocating to a new country at 50 & then losing her husband of 40 years (my grandfather - who I never had the pleasure of knowing) to lung cancer.  What makes her story unique, and why I still see her as the superhero from my childhood days, is when her husband passed away she pushed on, put her existing skills to use and embarked on a her first  career (outside of the home) as a seamstress.  Also, once she retired she discovered a hidden talent for art at 65, creating some of the most wonderful paintings that I am proud to have on my walls. 

I know that there may not be too many years left, and those that are will not be easy as her memories slip farther away.  But I will always be grateful for my memories, the cuddles & kisses and the Rock Buns.

Rock Buns
(makes about 24)

Ingredients:

2 cups all purpose flour
1/2 cup sugar (either brown or white, up to you)
1 tsp baking powder
1/2 cup unsalted butter, cold
2 eggs, room temperature
2 tsp vanilla
1/2 cup chocolate cups (optional)
1/2 cup coconut (optional)
1/2 cup cranberries (optional)
Milk
1/4 cup turbinado sugar or nonpareils for sprinkling

Directions:

(1) Preheat the oven to 350 degrees
(2) Line a couple of baking trays with parchment paper; set aside
(3) In a mixing bowl, combine flour, sugar and baking powder
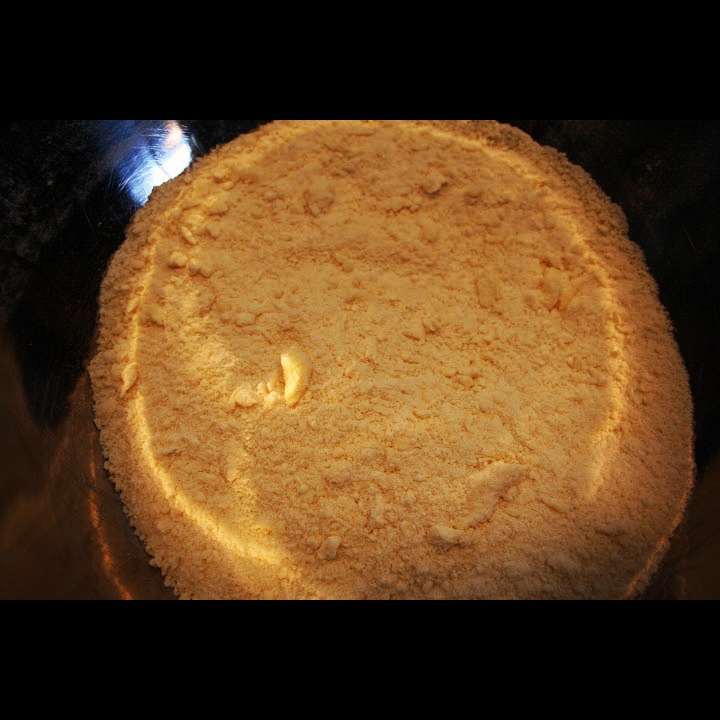
Flour, sugar & baking powder...
(4) Add cold butter in pieces (I cut mine into 1 inch chucks); cut butter into flour with dry clean fingertips or a pastry cutter until the mixture resembles a course meal
Course meal texture...
(5) Combine 'optional' ingredients with the flour/butter 'course meal' mixture

       
Optional Ingredients: 1/2 cup Cranberries & 1/2 cup Coconut                     1/2 cup Chocolate Chips                     

(6) In a separate bowl, lightly beat the eggs and vanilla together
(7) Add the egg mixture to the flour mixture; fold flour mixture and egg mixture with a spatula until it just comes together
-if the mixture is too crumbly and does not come together, add 1 tablespoon of milk at a time and continue to fold until the mixture comes together like a rough cookie dough
Rock Bun dough with chocolate chips...                          Plain Rock Bun dough...                    
(8) Using two spoons, scoop about a golf ball sized mound with the first spoon and push it onto the baking tray with the second spoon
-It's okay if the bun is irregularly shaped (the idea is to make them look like a rock...hence the name - 'Rock Buns'...). 
Almost ready to bake!
(9) Brush each rock bun lightly with milk; sprinkle with nonpareils or turbinado sugar
Okay, now we are ready to bake...
(10) Bake for 25-30 minutes, until edges are golden brown
(11) Remove the Rock Buns from the oven and let cool slightly on baking trays before moving them to cooling racks
Baked Rock Buns...

(12) Rock Buns can be served slightly warm; alternately, you can warm them up (either in the microwave or in the oven @325 degrees) before serving them as well

My Dad likes the shredded coconut and cranberry variety....
I had 'a-ha' moment yesterday (I love Oprah) - rock buns with lemon zest.  I think I will be doing that sometime next weekend. 

Happy Cooking!

Thursday, March 1, 2012

Red Velvet Cake


I have been having love affair with Red Velvet Cake for about 5 years now.  I discovered the wonderful that is the red velvet cake when I was visiting family in Florida.  And now, I love anything red velvet (except for this red velvet latte I tried last Christmas...lets just say that my taste buds were offended by it...).   There is something so deliciously perfect about the combination of red velvet cake and cream cheese icing.  It's not often that we find red velvet cakes in the supermarket or bakeries here in Canada (it's just not as popular here as it is in the USA) so I have been on a mission to spread the 'Red Velvet Word' ever since.

After discovering red velvet, I also set out on a quest to find the perfect red velvet cake recipe.  There were so many out there that I had a problem finding one that was (1) A rich deep red colour - not brown-ish red (2) Had a hint of cocoa that was not overwhelming (3) Perfectly moist, because really, who likes a dry cake?!?  I used a recipe I found here and here as a base and adapted it to my liking. 

So, I am not a cake decorator (can't be good at everything).  I took a cake decorating class with my best friend a couple of years ago and I failed miserably.  I have always had a *very slight* tremor in my hand.  It's not noticeable, but has meant that I would never have had a career as a surgeon...and apparently also meant I would never be able to write well with icing on a cake - the instructor couldn't understand why my 'Happy Birthday' looked like a font out of a 1950's horror movie.  But one day I stumbled across this rosette icing technique on 'I am Baker'.  I found it super easy and not incredibly time consuming.  I love the look of the rosettes clustered on cakes and cupcakes.  I used a 2D tip instead of the suggested 1M (because that's what I had from the cake decorating class) and it worked fine. 

These are not roses...they are cupcakes!!!
(I have only made this cake using a scale to measure out the ingredients.  The next time I make it, I will convert the measurements to cups and update... )

Red Velvet Cake
Makes 2 9"cakes or 24 cupcakes


Ingredients:

5 1/2 ounces all purpose flour
4 ounces cake flour
1/2 ounce natural cocoa
1 tsp baking powder
1/4 tsp baking soda
1/2 tsp salt
1 cup low fat buttermilk
1 fluid ounce red food colouring
1 tbsp white vinegar
2 tsp vanilla extract
1 tsp almond extract
10 1/2 ounces dark brown sugar
4 ounces of unsalted butter, room temperature
2 whole eggs, room temperature

Cream cheese frosting (recipe follows)

Directions:

(1) Preheat oven to 375 degrees
(2) Line the bottom of two 9" pans with parchment paper, rub the sides of the pan and the parchment paper down with butter or line 2 standard muffin tins with paper liners, set aside
(3) In a small mixing bowl, whisk flour, cocoa powder, baking powder, baking soda and salt; set aside
Flour, cocoa powder, baking powder, baking soda & salt...
(4) In a separate bowl, whisk buttermilk, vinegar, vanilla extract, almond extract and red food colouring; set aside
Buttermilk, vinegar, vanilla, almond & red food colouring...

(5) With an electric mixer on medium speed, combine butter and sugar and mix until light and fluffy
(6) Add the eggs one at a time, mix until combined
(7) Turn the speed on the mixer to low, add the flour mixture in 3 instalments, alternating with the buttermilk mixture; mix on low speed until smooth (about 30-45 seconds)
(8) Divide the batter between the two 9" pans or two muffin pans
I love the deep red colour of this batter....
(9) Bake 9" pans for 30-35 minutes or muffin pans for 18-20 minutes, until the center of the cake springs back when pressed
-Cupcakes will take less time to bake then a full cake. 
(10) Remove the pans from the oven and let sit for about 10 minutes before removing the cake from the pans. 
(11) Let the cakes cool completely ( at least 1-2 hours) before frosting


Cream Cheese Frosting

Ingredients:

1 pound icing sugar
12 ounces cream cheese (room temperature)
3 ounces unsalted butter (room temperature)
1 1/2 tsp vanilla
1/2 tsp almond extract
Pinch of salt

Directions:

(1) Combine the cream cheese and butter on medium speed until just blended
(2) Add the vanilla and salt, mix until combined
(3) Turn the speed of the electric mixer to low (or you will have a big powder-y mess) add the powdered sugar in 4 batches beating until smooth. 

***If icing is not stiff enough to decorate with, place in fridge for 1/2 hour or add more powdered sugar until desired consistency is reached.  (I do this 1/2 cup at a time if needed)
***Alternately, if icing is too stiff, add a tiny touch of water until desired consistency is reached. 

Sometimes I double the recipe for the icing depending on how elaborate I am going to be with the icing of the cake.  The extra icing can always be refrigerated and frozen, for the next time....


Happy Cooking!

Friday, February 24, 2012

Bacon Tomato Lentil Pasta

These lentils look so pretty!
 Things I love about this recipe:
(1)   It’s got bacon (and no….I do not have a bacon addiction ….I’ve been tested...)
(2)    I love the bitter flavor of arugula
(3)    The lentils make the pasta seem creamy without actually adding any cream (healthy-ish, right?)
a.     I've also heard that lentils are good for you (wikipedia knows everything!)
(4)   The ingredient list is pretty simple...
a.     Whenever a recipe calls for 'pasta', I try to use brown rice pasta (as a general rule, I 'try' to 'healthify' the rest of my diet in an effort to balance out the amount of bacon that I consume....)
b.     If arugula isn't your cup of tea, you can supplement with flat leaf parsley (...now, I am not trying to tell you what to do here, but I would really 'recommend' giving arugula another try... )

I adapted this recipe from one I found in a Martha Stewart magazine a million years ago.  It's a good hearty winter pasta and makes for good leftovers. 

(Although I don't always do this....even though I should) I recommend reading the directions in its entirety prior to starting the recipe.  In order to minimize the cooking time,  you can caramelize (- this is possibly the most overused word in my Dad's vocabulary....he'll be excited that it made an appearance on my blog...) the onions and boil the lentils at the same time.

Bacon Tomato Lentil Pasta
(Makes 4-6 servings as a main course)

Ingredients:
4-5 slices smoky bacon, diced
2 large onions, thinly sliced (about 4 cups)
Salt & pepper
12 ounces tomatoes, cored and diced (2 cups) (In the winter, I use the unsalted canned ones – I think 'Unico' is the brand)
3/4 cup lentils, rinsed and picked over for the hard/sandy bits
1 bay leaf
Low sodium chicken or vegetable stock
12 ounces (brown rice) fusilli or another short pasta
1 bunch arugula
1/2 cup finely grated parmesan

Directions:
(1) In a large skillet over medium heat, sauté bacon pieces until crispy
When I remove the crispy bacon from the pan, I put it on a plate lined with paper towel to suck up the extra grease...
(2) Remove bacon from pan; drain out all but 2 tablespoons of bacon fat from the skillet.
(3) Add the onions and 1/2 tsp of salt; cover and cook on medium-low heat (stirring occasionally) until onions are wilted (about 20-25 minutes).
Wilted onions....
(4) Remove cover and turn heat to medium.  Cook onions, stirring often, for about 30 minutes until onions are a rich brown colour.
Caramelized onions....
(5) Add back bacon pieces and tomatoes to the skillet; cook for about 5 minutes more stirring often.
(6) (while the onions are wilting/browning) In a medium sauce pan, cover lentils with chicken stock by 1 inch.  Add the bay leaf to pot.
(7) Bring the lentils to a simmer; then cover and let cook for 20-25 minutes - until they are tender, but still hold their shape.
(8) Once the lentils are done, drain them and mix into the onion/bacon/tomato mixture.  Season for salt and pepper.
Onion/bacon/tomato/lentil mixture....
(9) Cook pasta in salted water until tender; reserve 1/2 cup of pasta water, drain pasta and return the pasta to the pasta pot (this will be a good place to mix everything together).
(10) To the pasta, add the lentil mixture, 1/2 cup of parmesan cheese and the 1/2 cup of pasta water.  Toss, drizzle with a bit of olive oil (I drizzled with hazelnut oil, because I had some on hand - which added a lovely nutty flavour) and serve with more parmesan if required.
This pasta makes for good leftovers the next day....
...Should you want to make this a vegetarian dish, (1) Scrap the bacon (gasp) and use 2 tablespoons of olive oil prior to adding the onions and salt in Step 3; & (2) Use vegetable stock or water to boil the lentils in Step 7.


Happy Cooking!