Showing posts with label Snacks. Show all posts

Thursday, June 14, 2012

Dairy Free Berry Cupcakes


I have a little munchkin in my life who can't have dairy.  Now, I imagine that it’s hard to avoid dairy when you have a kid, considering all of the ready made foods and snacks out there that kids love which contain dairy....and I knew I would be seeing his mama so I thought I would send these along with her for him to try - Dairy Free Berry cupcakes.   Fresh berries are in abundance at this time of year in Ontario, which is perfect for this recipe.....


Dairy Free Berry Cupcakes
(Adapted from 500 cupcakes)
Serves 12


Ingredients:

2 1/2 cups mixed fresh berries (blueberries, strawberries, cranberries, blackberries - I used blueberries, and strawberries)
2 cups all purpose flour
1/2 cup packed brown sugar
1 tbsp baking powder
2 tsp vanilla extract
1/2 tsp almond extract
4 tbsp vegetable oil
2 lightly beaten eggs

1/2 cup mixed berry jam

Directions: 

(1) Preheat the oven to 350 degrees
(2) Line a muffin pan with cupcake liners
(3) In a food processor, puree 1 1/2 cups of the berries until smooth
(4) in a small bowl, dice up the remaining berries
Diced strawberries...
(5) In a medium mixing bowl, combine the flour, sugar and baking powder; set aside
(6) In a large mixing bowl, combine the eggs, oil, vanilla and almond extract
(7) Add the puréed berries to the wet ingredients
(8) With a spatula, fold in the dry ingredients
(9) Fold in the remaining diced berries
(10) Spoon the batter into the cups
-I put about a heaping 1/4 cup of batter in each cupcake cup...they will rise a bit as they are baking...
(11) Top each cupcake with a teaspoon of jam
-I used the Smuckers 'no sugar added' Strawberry variety
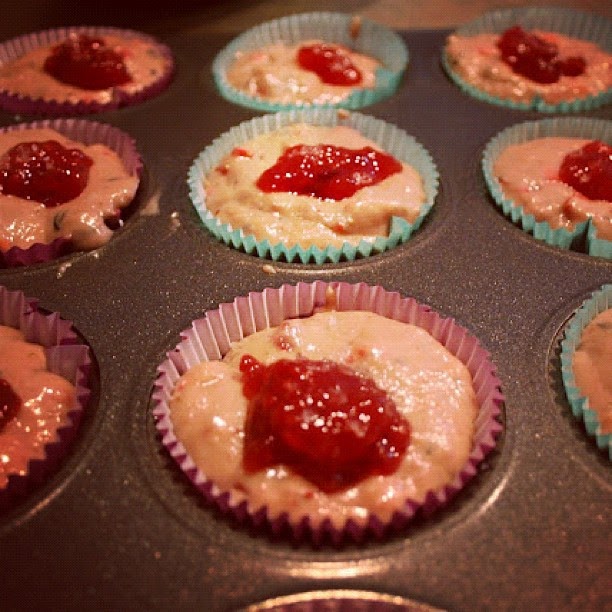
Ready to bake!

(12) Bake for 20 minutes or until toothpick is dry
(13) Remove pan from oven and cool for 5 minutes
(14) Remove the cupcakes and cool completely on a rack
-These can be stored in an airtight container for up to 3 days & frozen for up to 3 months...


Nutritional Information (for one cupcake):
Calories 199
Fat 5.5g
Carbs 33.2g
Fibre 1.7g
Protein 3.2g
Sugar 15.6g
Sodium 92.7mg
WW points 5

Optional - If you are not too concerned about your sodium intake, I put a couple of large salt crystals on top of the strawberry jam (prior to baking) to add to the flavour dimensions...

There are a couple of yummy alternatives to the berries:
Peach and berry cupcakes
-substitute 1 1/2 cups canned peaches - puréed, for 1 1/2 cups of the mixed puréed berries
Apple and berry cupcakes
-substitute 1 1/2 cups unsweetened apple sauce for 1 1/2 cups of the mixed puréed berries
-I haven't tried this version - but when I do I might add some cinnamon and a pinch of nutmeg....

Happy Cooking! 

Thursday, April 12, 2012

Oreo Cadbury Mini Egg Easter Squares


Sometimes I'll take two things I love - like Oreos and Cadbury Mini Eggs - and combine them, thinking - since they are so good on their own - together can only be better.  Sometimes it's an epic fail....

But sometimes, it's a major win! This is what happened with this mashup of Oreo cookies, Cream Cheese and Cadbury Mini Eggs...
Cadbury Mini Eggs are one of the best things about Easter!
The inspiration for this recipe came from a lovely blogger - Buttercream Blondi - who's creations are always gorgeous and inspiring. 

I realize that this post is little after the fact (considering Easter was last weekend) but I really think that these would be good any time of the year with any candy covered chocolate (M&M's, Reese’s Pieces etc). 

Oreo Cadbury Mini Egg Easter Squares
Makes about 24 squares (depending on how big you cut them)

Ingredients:

Crust:

1 package of Double Stuffed Oreos, cookies and cream separated
5 tbsp butter, melted to liquid (but not smoking hot)
6 ounces of Cadbury Mini Eggs

Filling:
(Adapted from Buttercream Blondi)

16 ounces cream cheese, room temperature
1/2 cup of sugar
2 eggs
2 tsp vanilla extract
1 tsp almond extract
2 tsbp heavy cream
8 ounces Cadbury Mini Eggs
  
Directions:

Crust:

(1) Preheat the oven to 325 degrees
(2) Grease the bottom of a 8" square pan with butter
(3) Take the cookie part of the separated Oreo cookies and crush them
-this can be done with a rolling pin, or food processor (I used a food processor – easy peasy)
(4) Crush the Cadbury Mini Eggs
-I did this with a mortar and pestle.  However I am sure a good couple of whacks with a rolling pin would suffice.
It looks like a massacre of Caburys Mini Eggs was discovered in dirt! 
(5) Using a spatula, combine the Oreo crumbs, Cadbury Mini Eggs and butter

(6) Press into the bottom of your greased square pan
(7) Bake at 325 degrees for 8-10 minutes.
-bake until it sets
(8) Remove from oven, set aside and let cool

Filling: 

(1) Crush Cadbury Mini Eggs
-This can be done with a rolling pin or food processor or mortar and pestle

(2) With an electric mixer on medium speed, combine cream cheese and sugar until smooth
(3) Add eggs, vanilla & almond extract and heavy cream (mmmm...creamy...).  Mix until combined.
(4) Add crushed Cadbury Mini Eggs, mix until combined
(5) Pour the batter on top of the cooled crust
(6) Bake at 325 degrees for 45 minutes
(7) Turn the oven off.  Leave pan in the oven for 5-10 minutes more.
(8) Let the bars cool to room temperature before putting them in the refrigerator.
(9) Refrigerate overnight before cutting them.  A really good sharp knife should do the trick...


Notes:
-I put a pan of water into the oven when baking cheesecakes.  This helps to add some humidity to the oven in an effort to stop some of the cracking that (inevitably) goes on when I bake cheesecakes.  Sometimes it works, sometimes it doesn't.   When it doesn't and there are cracks, I will usually either throw on some icing or fruit or just eat it as it, because in the end, it's still yummy cheesecake, cracks and all....
-Try to open the oven as little as possible - this will let some of the steam (humidity) escape.

Warning: these are addictive...
On that note...
You know when you make something really sugary and yummy and you can't stop eating it...so you give most of it away thinking that you'll be able to exercise some self control and won't binge on the few tiny squares that you've kept, but then you do....This may or may not have happened to me a couple of days ago.... 
I am a believer in the 'everything in moderation' philosophy towards food....so in a effort to curb my seemingly increasing sweet tooth (and after the 60 minutes episode I saw a couple of weeks ago about sugar toxicity), I’ve decided to go sugar free (just refined sugars, not the naturally occurring stuff - like what's in fruit) for the rest of the month.  It's day two (and yes, I cheated once yesterday) I have a headache and it feels a little like I'm being tortured... 
Buckle up.  This is not going to be pretty.... 

Happy Cooking!

Monday, March 5, 2012

Rock Buns


My Grandmother.....
When I was younger, my grandmother often came over and spent the weekend.  This was always so exciting, because I was lucky enough to have one of those grandmothers who spoiled me with attention, cuddles & kisses.  AND when we baked together she would let me put sprinkles on everything - & when your 6, the person who lets you put sprinkles on things is the next best thing to Santa Claus. 

One of the earliest memories I have in the kitchen is baking Rock Buns with my grandmother.  Rock buns are an excellent breakfast/snack foods.  Think muffins without the bottom (I only eat the tops of muffins...unless it is an amazing muffin - like a chocolate chip muffin - only then I might consider eating the bottom).  Rock buns are super easy to make.  They take maybe 15 minutes to mix, and 25-30 minutes to bake.  And you can put pretty much anything in the rock buns to make different variations - shredded coconut, cranberries, chocolate chips...the options are endless!

It was my grandmothers 87th birthday last weekend.  Like many 87 year old, her short-term memory is not too good, and she sometimes has a vacant look in her eyes.  It's the unfortunate signs of Alzheimer’s setting in. 

Her story is not unlike many woman with a South Asian background from her generation - Arranged marriage at 13, had her first child (of nine) at 15, complete with relocating to a new country at 50 & then losing her husband of 40 years (my grandfather - who I never had the pleasure of knowing) to lung cancer.  What makes her story unique, and why I still see her as the superhero from my childhood days, is when her husband passed away she pushed on, put her existing skills to use and embarked on a her first  career (outside of the home) as a seamstress.  Also, once she retired she discovered a hidden talent for art at 65, creating some of the most wonderful paintings that I am proud to have on my walls. 

I know that there may not be too many years left, and those that are will not be easy as her memories slip farther away.  But I will always be grateful for my memories, the cuddles & kisses and the Rock Buns.

Rock Buns
(makes about 24)

Ingredients:

2 cups all purpose flour
1/2 cup sugar (either brown or white, up to you)
1 tsp baking powder
1/2 cup unsalted butter, cold
2 eggs, room temperature
2 tsp vanilla
1/2 cup chocolate cups (optional)
1/2 cup coconut (optional)
1/2 cup cranberries (optional)
Milk
1/4 cup turbinado sugar or nonpareils for sprinkling

Directions:

(1) Preheat the oven to 350 degrees
(2) Line a couple of baking trays with parchment paper; set aside
(3) In a mixing bowl, combine flour, sugar and baking powder
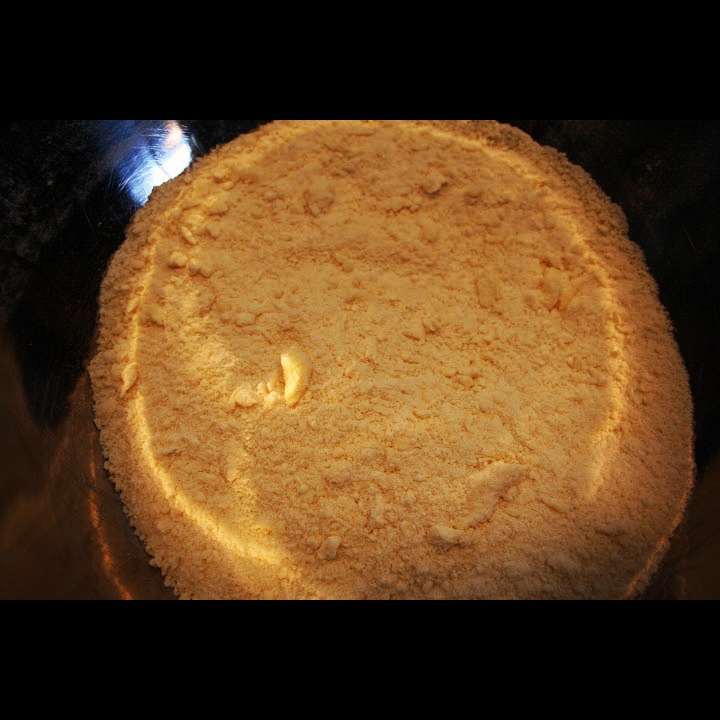
Flour, sugar & baking powder...
(4) Add cold butter in pieces (I cut mine into 1 inch chucks); cut butter into flour with dry clean fingertips or a pastry cutter until the mixture resembles a course meal
Course meal texture...
(5) Combine 'optional' ingredients with the flour/butter 'course meal' mixture

       
Optional Ingredients: 1/2 cup Cranberries & 1/2 cup Coconut                     1/2 cup Chocolate Chips                     

(6) In a separate bowl, lightly beat the eggs and vanilla together
(7) Add the egg mixture to the flour mixture; fold flour mixture and egg mixture with a spatula until it just comes together
-if the mixture is too crumbly and does not come together, add 1 tablespoon of milk at a time and continue to fold until the mixture comes together like a rough cookie dough
Rock Bun dough with chocolate chips...                          Plain Rock Bun dough...                    
(8) Using two spoons, scoop about a golf ball sized mound with the first spoon and push it onto the baking tray with the second spoon
-It's okay if the bun is irregularly shaped (the idea is to make them look like a rock...hence the name - 'Rock Buns'...). 
Almost ready to bake!
(9) Brush each rock bun lightly with milk; sprinkle with nonpareils or turbinado sugar
Okay, now we are ready to bake...
(10) Bake for 25-30 minutes, until edges are golden brown
(11) Remove the Rock Buns from the oven and let cool slightly on baking trays before moving them to cooling racks
Baked Rock Buns...

(12) Rock Buns can be served slightly warm; alternately, you can warm them up (either in the microwave or in the oven @325 degrees) before serving them as well

My Dad likes the shredded coconut and cranberry variety....
I had 'a-ha' moment yesterday (I love Oprah) - rock buns with lemon zest.  I think I will be doing that sometime next weekend. 

Happy Cooking!

Tuesday, February 21, 2012

Bacon Caramel Popcorn


I still have bacon left over in the freezer from the Butchery and Charcuterie class that I took last November/December. 

My lovely aunt (the same one who organizes our yearly cookie exchange) sent me this recipe a couple of weeks ago as she knows I have a particular affinity for anything with bacon in it....

I love caramel popcorn.  (and I'm sure I am not the only person that finds it addictive.)

So - because of all of these things, I felt like the stars were aligning for me to make this recipe. 

Bacon Caramel Popcorn 
Adapted from Edible Canada.
(Approx. 10 servings)

Ingredients:

3/4 pound of bacon
1/3 cup of popcorn kernels
1 cup salted butter
2 cups brown sugar
1/2 cup corn syrup
Pinch of sea salt
1 tsp baking soda

Directions

(1) Finely chop the bacon and fry until crispy; Once cooked, removed bacon pieces from pan with a slotted spoon (I put mine onto a plate lined with paper towel to suck up any excess grease)
-I fry the bacon in a deep pot; which can then be used to pop the popcorn - thereby reducing the amount of dishes that need to be washed...
Mmmmmm...Crispy bacon....

(2) Reserve about 4 tablespoons of the bacon fat (supplement with butter if required); Heat the bacon fat in a large pot with a cover. 
(3) Add a few popcorn kernels to the pot and cover - Listen for the kernels to pop; Once they have popped, add the rest of the popcorn kernels;  Cover and shake occasionally until the popping stops.
(4) Put the popped corn in a deep mixing bowl...
***make sure to remove the un-popped corn kernels (this is very important - otherwise you will have a big sticky mess in the oven if that's where the un-popped (caramel covered) kernels decide to pop)***

(5) Preheat oven to 225 degrees.
(6) In a large pot, heat the butter, brown sugar, corn syrup and salt over medium-high heat (stirring occasionally) until it reaches 275 degrees on your candy thermometer.
-be very careful when handling this mixture - hot caramel will burns your skin quickly....

(7) When your candy thermometer says 275 degrees, remove caramel from heat and stir in baking soda and bacon bits...
-the baking soda will cause the caramel to double in size


(8) Pour the caramel over the popcorn and mix until covered.


(9) Put the caramel covered popcorn in a baking tray lined with parchment paper.
·         Step 7, 8 & 9 - try to do this quickly (and carefully) - as the caramel cools, it will harden
(10) Place in oven for an hour; Using a silicon spatula, turn caramel covered popped corn every 20 minutes to redistribute the caramel and bacon bits.  

Mmmmm...Bacon Caramel Popcorn in the oven!

(11) Remove from oven, let cool a bit before tasting (hot sugar in mouth can only lead to disaster); Add more salt if necessary.


(12) Once it's completely cooled, break into bite size pieces.

Optional - once it's cool enough to handle, but not completely hard yet, you can roll chucks into balls for presentation purposes...

***If you don't want to put in bacon (it’s beyond my why you wouldn’t want to put the bacon in), you can supplement with some roasted peanuts (like the cracker jack popcorn) in step 7***
Happy Cooking!